#
Immersal Mapper 2.0
Pre-built app for mapping real-world locations.
#
Download the App
Immersal Mapper is available in Apple's and Google's app stores.
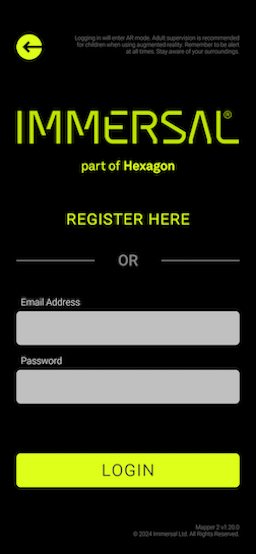
The app requires an Immersal Cloud Service account. You can register one for free in the Developer Portal
#
User Interface
#
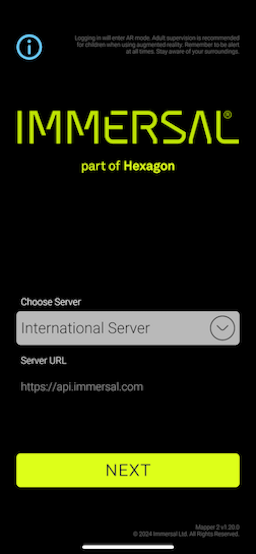
Choose Server
You can choose between three servers
- International Server
- China Server
- Custom Server
#
Login
The app requires an Immersal Cloud Service account. You can register one for free in the Developer Portal and use the same credential in the Immersal Mapper app.
#
Workspace Mode
#
Default View
When you log into the app, you can see the "All Maps" tab where all of your captured maps are available. It has 3 tabs you can choose from.
All Maps Shows local device and uploaded maps.

1. All Maps In Cloud shows uploaded maps. These are the maps that you can see in your development portal.
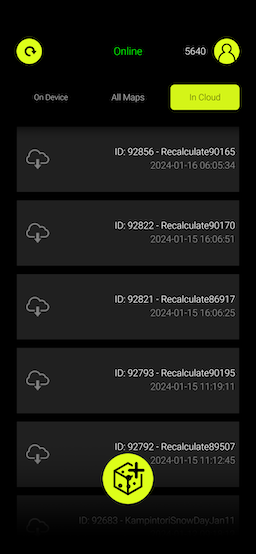
2. In Cloud On Device shows all the local maps in your device.
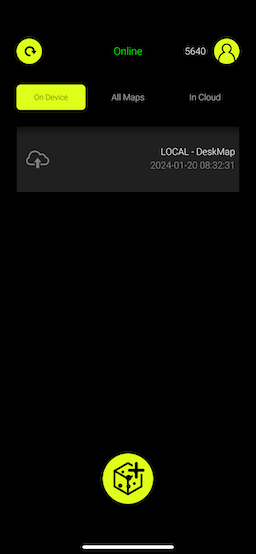
3. On Device
On top right are your profile details and user level. On top left you have a refresh button to update the view.
At the bottom you can see a yellow capture button. Click this to create a new map
#
Create New Map
The app has two capture modes,
- Manual Mode
- Realtime Mode
#
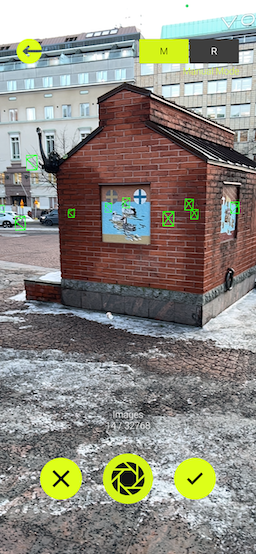
Manual Mode
This is the manual mode where you capture each image manually while walking around your target.
- Once you have captured the required map, you can save images on the device.
- Then upload images to the server for map construction.
- When the processing is done and map is ready to localize you can download the map and test it in AR mode.
#
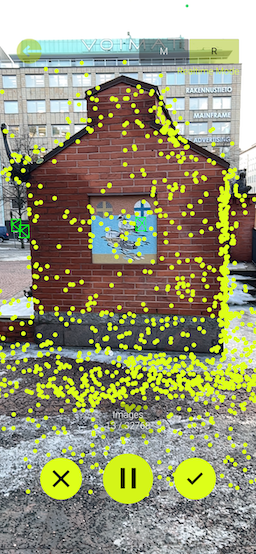
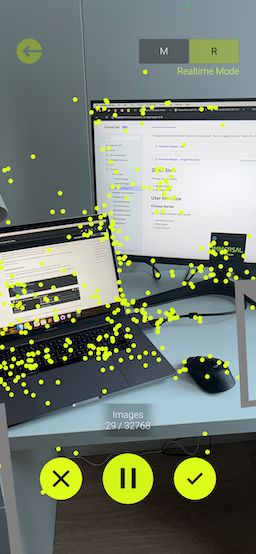
Realtime Mode
In Realtime mode you press the record button and move around the target area. It will start capturing automatically.
- Once your required map is captured click "Tick" button on the right to save the map
- if you want to re-capture the map you can press "cross" button on the left and start over
#
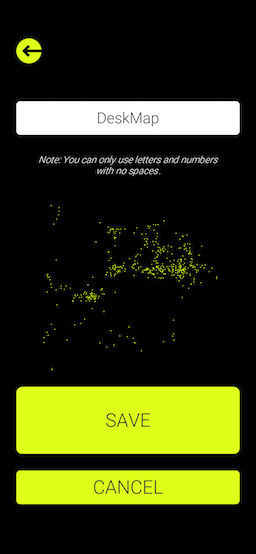
Saving a map
When you are done mapping you can view the point cloud of your captured map.To save the map it will ask you to give it a name.
you can only use letters and numbers without using any space to name the map.
press "Save" button and it will save the map on your device. You can find this map "ALL Maps" and "On Device" map list.
#
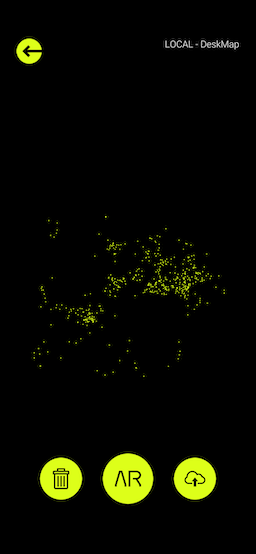
Visualize Mode
Go to the "All Maps" or "On Device" tab and tap on the map to visualise the map
Now you can view the point cloud, and at the bottom you have 3 options. You can test the map by clicking the "AR" button in the middle. If you get successful localizations, you can upload the map by clicking the "upload" button, or you can delete the map by clicking the "delete" button on the left.
#
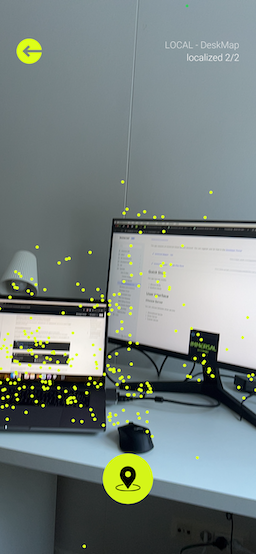
Localization
In localization mode you can validate the map before creating the experience.
- Press "Localize" button to localize to the map.
- On the to right you can see successful localizations.